


Let me say from the start that Cameron and I love American Girl. Simply adore it. What I do not love, however, are their prices. It’s not such a problem for Cam. She’s 6 and thinks a bank card equals money in the bank. Go figure…
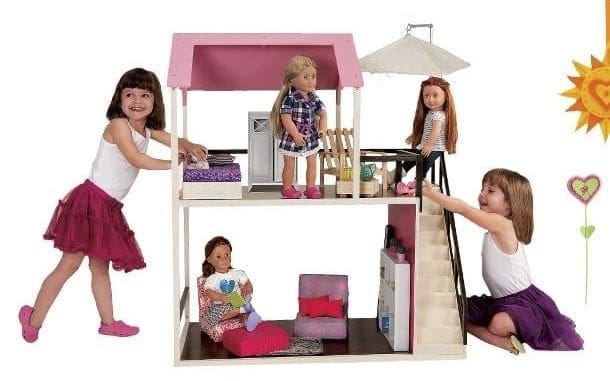
DIY American Girl Doll House
Anyway, Cami had 2 American Girl dolls, 3 Madame Alexander dolls, an Our Generation, and a Journey Girl. And all of their various “stuff”, including 2 beds, a dresser, a salon chair, and a Christmas Wish List for a kitchen and bathroom. Now would be a good time to mention that we live in a townhome. They aren’t known for the huge bedrooms… We bought her a loft bed, just so that she would have space to play in her room. Clearly, storage of all this was going to be an issue.
Enter, Target, and their Our Generation Wooden Dollhouse.
It’s beautiful; it really is. And at $100, the price tag wasn’t too bad either, but two rooms? Unless those 7 dolls were going to take dorm living to a whole new level, it wasn’t going to work.
Then I found Pinterest. A huge thank you to all those who share their ideas, for free, just to help others out! I found a couple of great ideas and got to work.
How to Build an American Girl Doll House
Here are the plans we used for our American Girl Doll House: Cami’s Craft Corner American Girl Dollhouse Plans
Home Depot sells various types of wood in 4 x 8 boards, and, get this, they will cut it for you, for free! We took in our blueprints and selected our wood. We chose this one: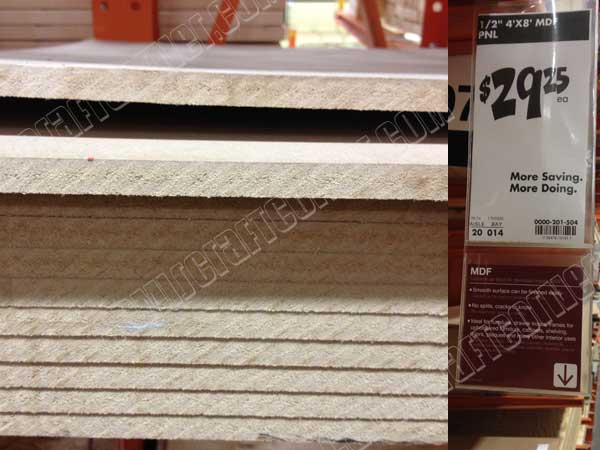 There are thicker and fancier wood choices, but this fit our budget and we didn’t want it to weigh too much. I believe I mentioned earlier that I’m cheap.
We needed two pieces. The first, we had cut into four 48 inch by 18 inch panels and two 22 inch by 18 inch panels, for the floor/ceilings and room dividers. The second piece we had cut into two 67 inch by 18 inch panels, for the sides.
Once the wood was cut, we swung past the paint aisle and picked up a gallon of this:

Perfect for what we needed and only $13.97 a gallon.
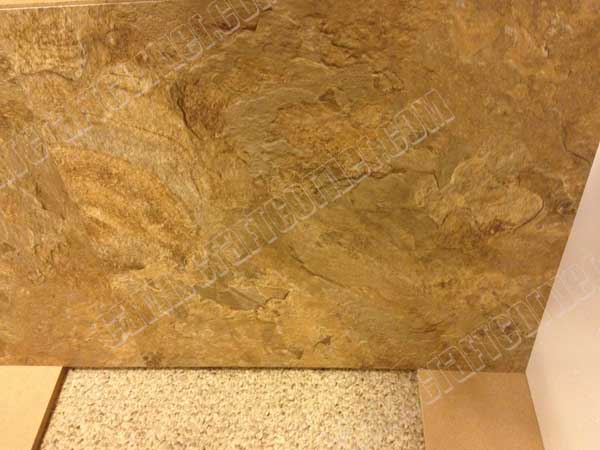
Next aisle: Press and Stick Flooring. We chose some 18 inch by 18 inch panels, because they would fit best, with the least cutting. But we ended up with mostly 12 x 12 inch ones. We used three 18 x 18 stone look for the bottom floor kitchen and dining area ($2.68 each), one 18 x 18 tile look for her bathroom ($2.68) and ten 12 x 12 hardwood-look panels for the rest of the house (.79 each).
Our total for wood, paint, flooring, and screws (which we didn’t use, but more on that later) was $105.54
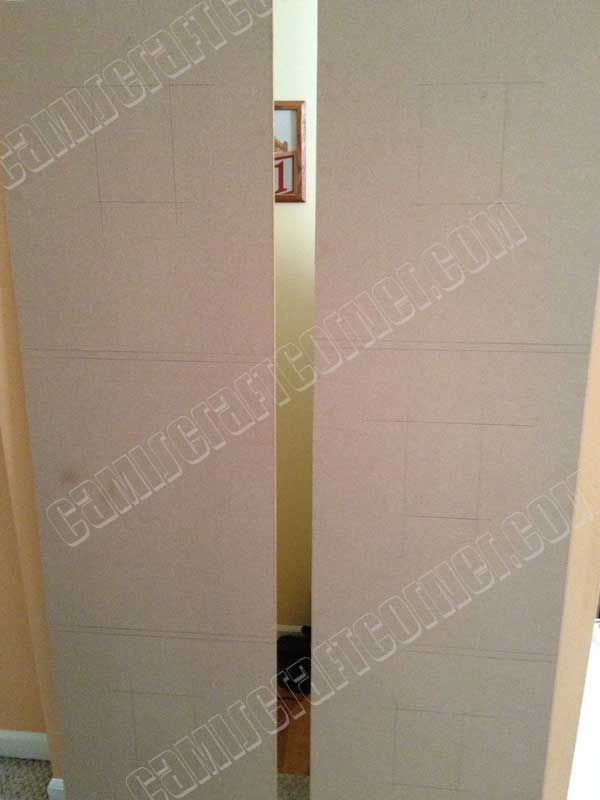
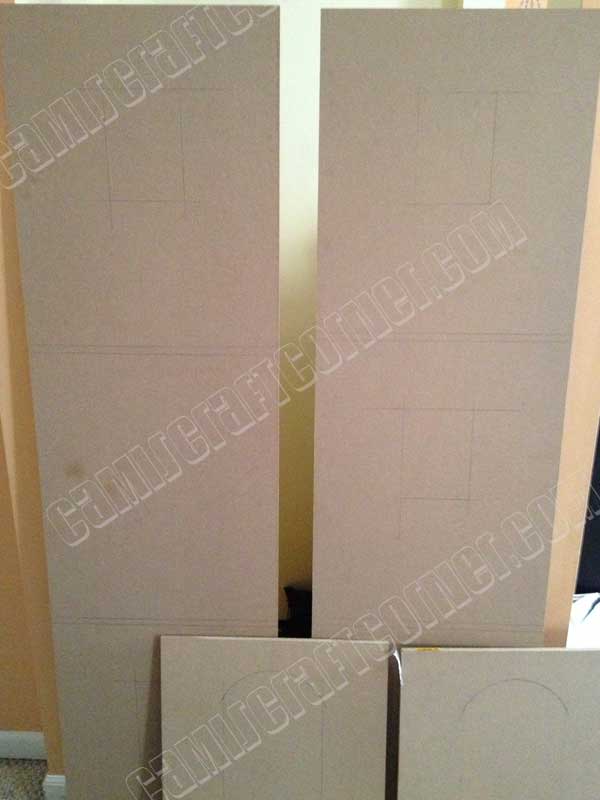
When we were ready to start, we first laid the boards out on the living room floor, the way we thought they would look put together. By leaning them against furniture and ourselves, we were able to get a good mock up going. Once we had the bottom floor and sides arranged, we put in a divider and placed the next floor on top. Then we traced where the floor met the walls. Next we put in the next divider, set the next floor on top, then traced where the floor met the walls again. Be sure to write on your dividers and floors which ones they are, just in case there’s a slight difference in divider height! We also drew arrows to indicate which end was up on the side panels.
Once we were done that, we could let the boards drop. (Still sporting a healthy shin bruise for not moving quickly enough, by the way).
Placing a doll (We used a Madam Alexander Doll because it’s slightly taller than American Girl Dolls) by each “floor” line, we decided how high up to make the windows. We also needed to decide how big to make them. We went with 5 x7 inches (which is also the exact size of the glass in the picture frames).
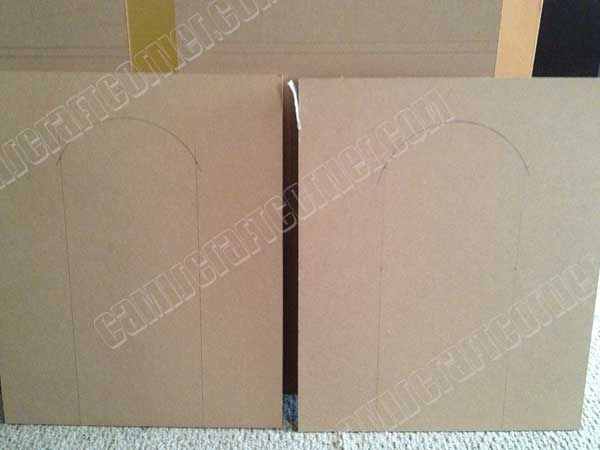 Likewise, we placed a doll on the room dividers to decide how wide to make the doorways. We went with 8 inches across and 20 inches at the highest point of the archway. We used the paint bucket to make a nice arch.
At this point, we needed a little outside help. Luckily, I’m a teacher (one of the reasons for the aforementioned cheapness) so I had help in the form of our wonderful STEM teacher, Steve, who took an afternoon of his time to cut out the windows and doors.
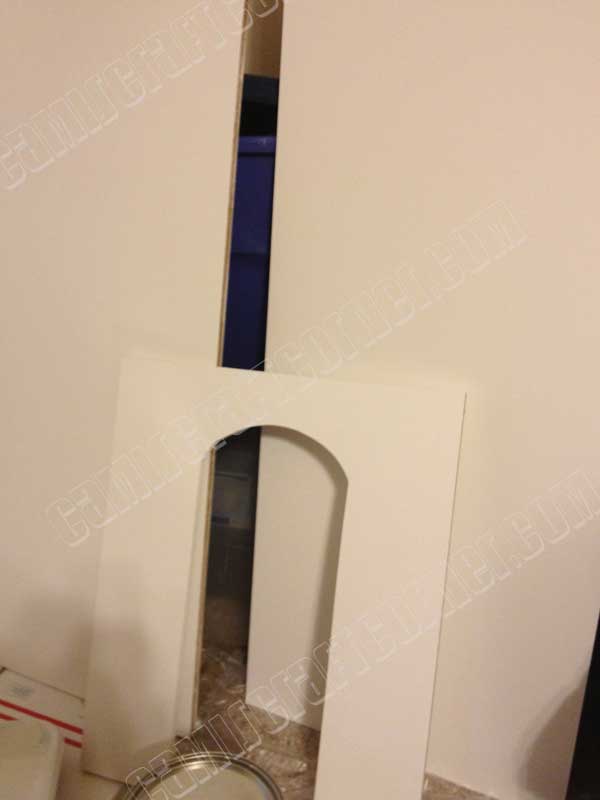 If you know someone with the tools to do this, start sucking up now. Or, you can certainly omit this step. I don’t think any kid will turn up their nose at the finished product just because it doesn’t have real windows or doorways.
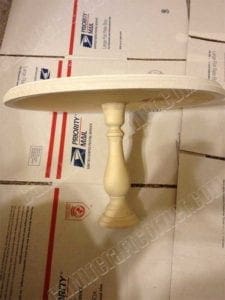
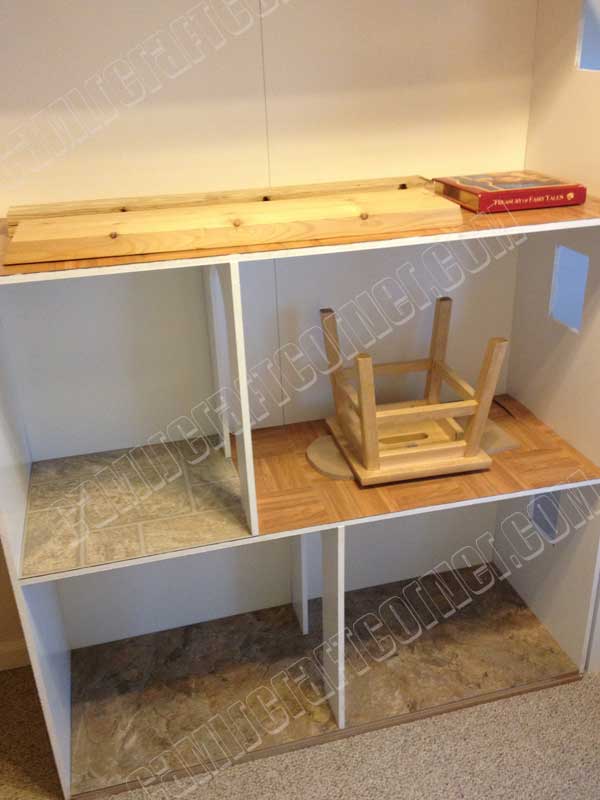
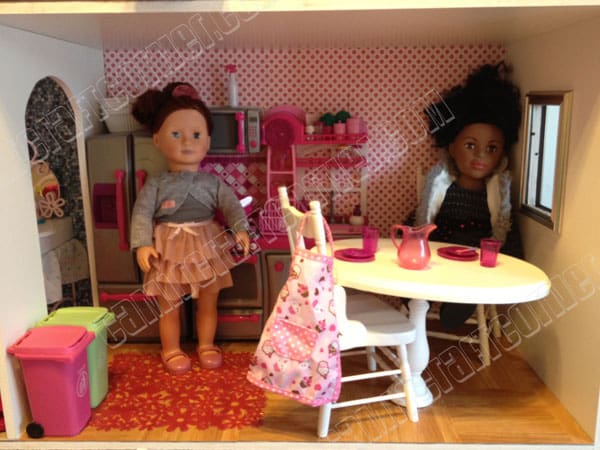
When I brought these back home, the next step was painting. Glad we went with the gallon because that wood was THIRSTY. We used 3 coats. The 3rd maybe wasn’t technically necessary, but we know our kid. Better safe than sorry. While we had the paint out, we also added a quick side step and made her a dining room table. Grab an unfinished wood plaque and candlestick from AC Moore or Michael’s Arts & Crafts, glue together (we used liquid nail to make it stronger), and paint. With 40% off coupons, it’s less than $10 (compared to a $50 American Girl table, it’s a steal)
Okay, now we were ready to get down to business. Since this was a Christmas present, we kicked the kid out of her room on December 23rd, under the guise of building her a “special bookshelf” for Christmas. While I’m sure that you may be able to build this elsewhere and move it, I wouldn’t advise it. It’s huge AND not really ideal for moving around.
We started by arranging the boards again on the floor and attempting to screw the bottom floor to the two sides. My husband insisted on using screws in case we ever wanted to “take it apart”. Um, okay… Problem. The boards started to separate when we used screws. In hindsight, my husband thinks that this might not have happened if we had used a drill to make pre-made holes, but we didn’t have a bit for that, so we turned to nails… lots of them.
We used 3-4 nails to attach each end of the floors to the sides. We didn’t get too close to the edges of the floors, in case that would make them separate, so I would say the first and last nails are about 2 inches back from the edges.
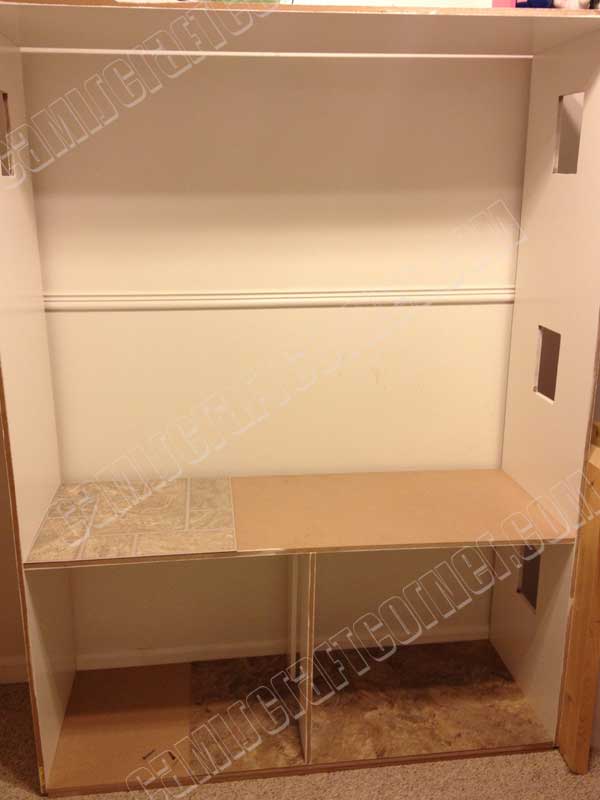
After attaching the bottom to the two sides, we put on the press and stick flooring. It’s important to remember to do that before you put in the room divider! Next we put in the room divider and nailed that in place (through the floor) as well. We put on the next floor and nailed the sides in place, as well as nailing to the top of the bottom room divider.
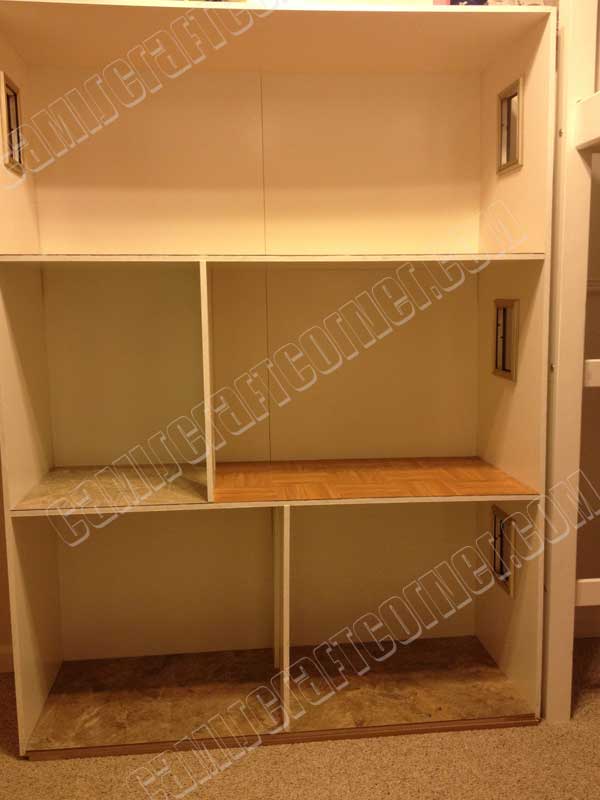
At this point, this thing was a little shaky… and so was my husband. He was terrified that the nails wouldn’t be sturdy enough to keep the whole thing together and tilt it up toward the wall without it collapsing. So we decided to put the top piece on, pray, and lift it up:

Ta-dah! Me and my blueprints: 1, Henny Penny: 0
To be fair, it was leaning a bit towards her bed, so we put some extra wood from the deck between the two, while we continued the build. Also, we have it sitting on top of a spare plank, just to keep the surface flat (since we were working on carpet).
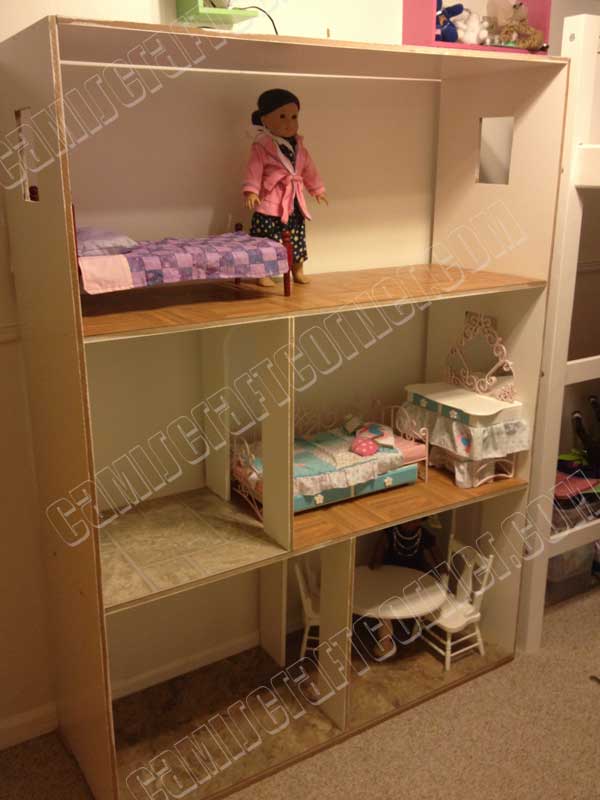
Moving on. We added the press and seal floors to this level (covering up the nail holes from the divider) and added the next divider. Since that one tile square was to be a bathroom, I moved the divider over there, making a smallish bathroom and large bedroom. We nailed the divider into place, added the last floor, and once again, nailed the floor to the sides and to the top of the divider. After we added the flooring it was BREAK TIME. We needed a minute to relax, eat, and convince the kids that we had not, in fact, killed each other, no matter how much banging, thumping around, and swearing they may have heard through the closed door. We added some of her doll furniture for scale and to send pics to the friends who were sure that we were going to kill each other. Not going to lie, people, make sure your marriage or friendship is strong before a project like this 😉

 After the break, my husband ran over to Home Depot for the back pieces. We used “Thrifty White Panel Board”. Forgot to snap a pic, so here’s the sku: 765096003006. And “Panel Nails”, sku 764666000131. $13.38 and $2.37, respectively. This is where we get into “If only I knew then what I know now” territory. These boards, like everything else, are sold in 4 x 8 panels. Our house ended up being 67 inches X 50 inches, or 2 inches too wide to use one board.
If you decide to cut the floors down to 46 inches long, instead of 48, I’m not judging… While you’re making changes, you may also decide to make it deeper, maybe 22 inches (so that you can turn the doll beds length-wise), but our daughter’s arms aren’t that long yet, so we’re good as it is.
Anyway, because we didn’t know at the time, we needed two boards, cut into 67 x 25 pieces. Grrr…
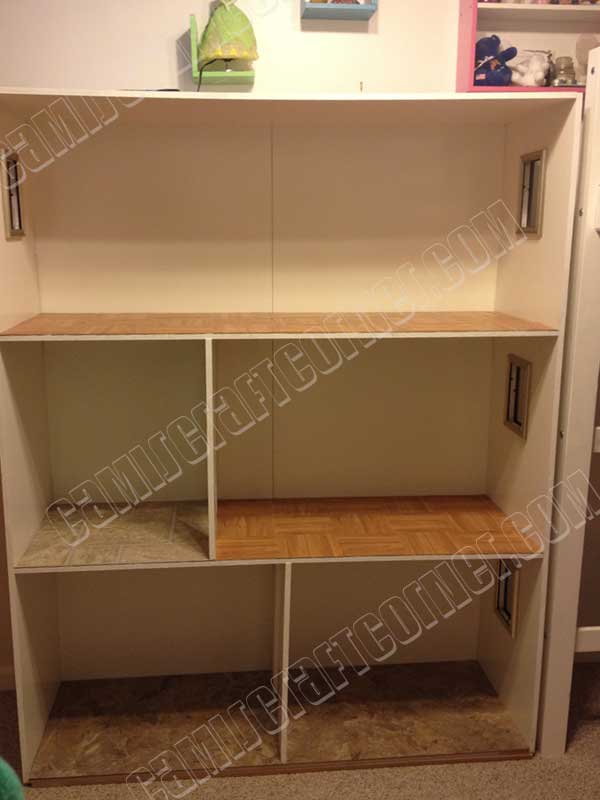
We but the back pieces on and used countless nails to hammer it on, around the edges and where it met the floors (think of putting the back on a bookcase), and painted a first coat on the exposed front edges of the house.
We then decided that we had put our ten years of marriage to the test enough for one night. We put some heavy books and things on the floors to make sure they stuck well and turned in. You may notice my arch nemesis of a wood plank in the middle right hand corner…
 Finally, it was Christmas Eve, crunch time. We put the final coats on the exposed edges and used Dollar Tree picture frames (5 x 7) to glue around the windows. We chose to leave the glass out, but that’s up to you.
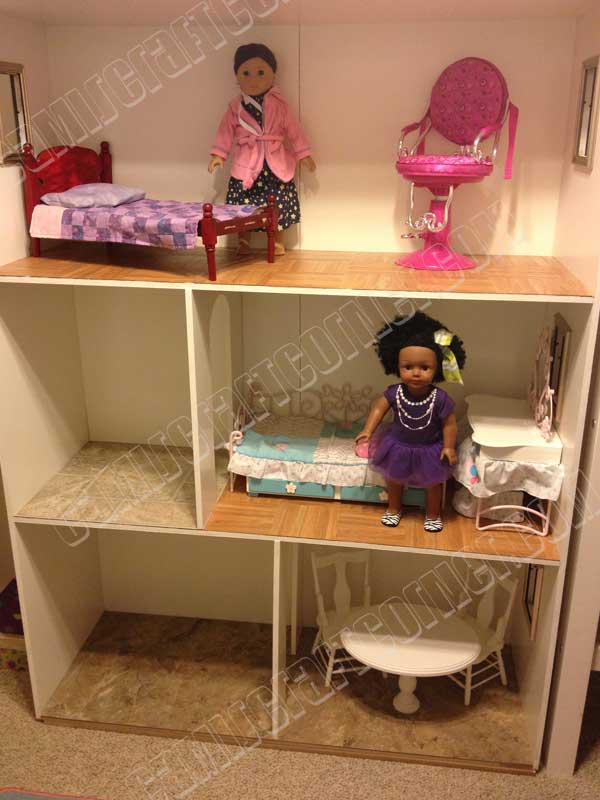
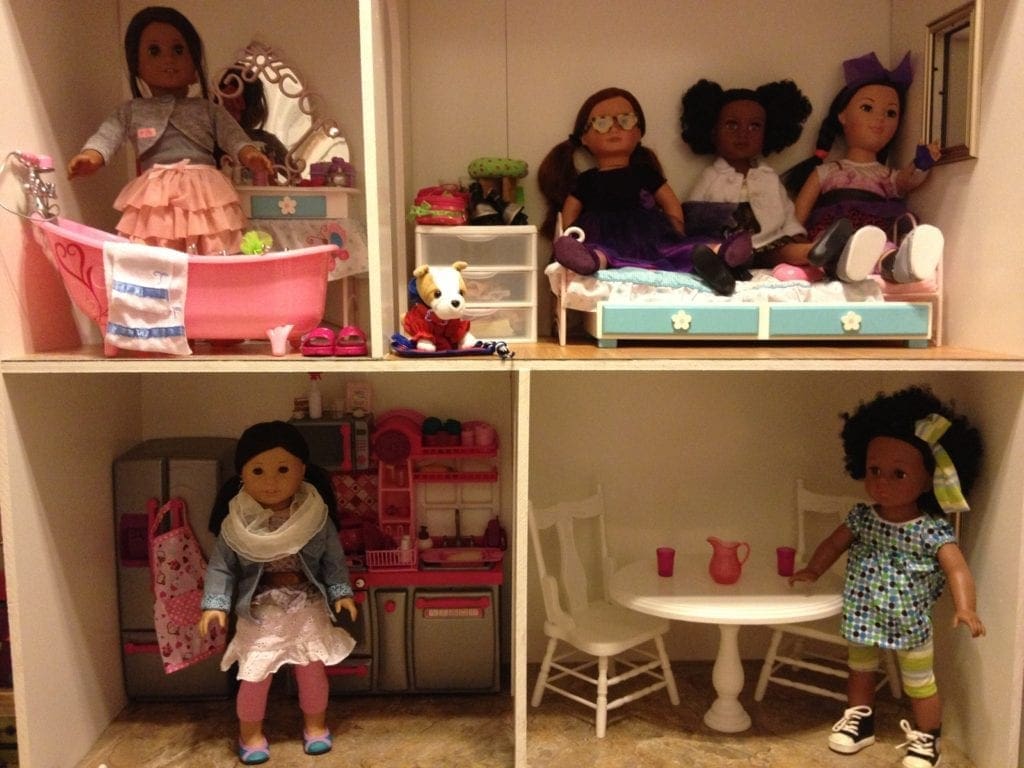
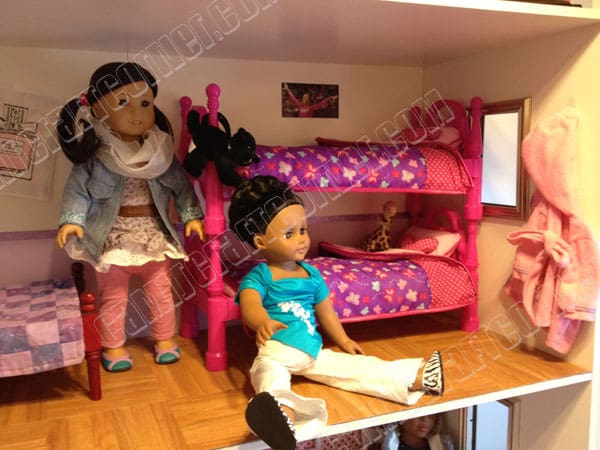
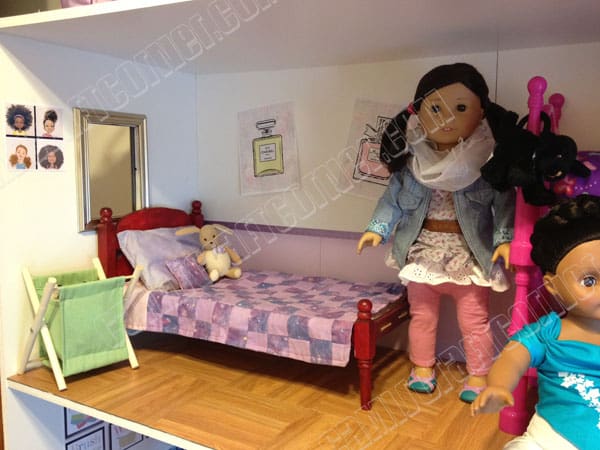
 Our final effort was to do some staging with some of the furniture she had already, plus her new table!
Christmas Morning!!
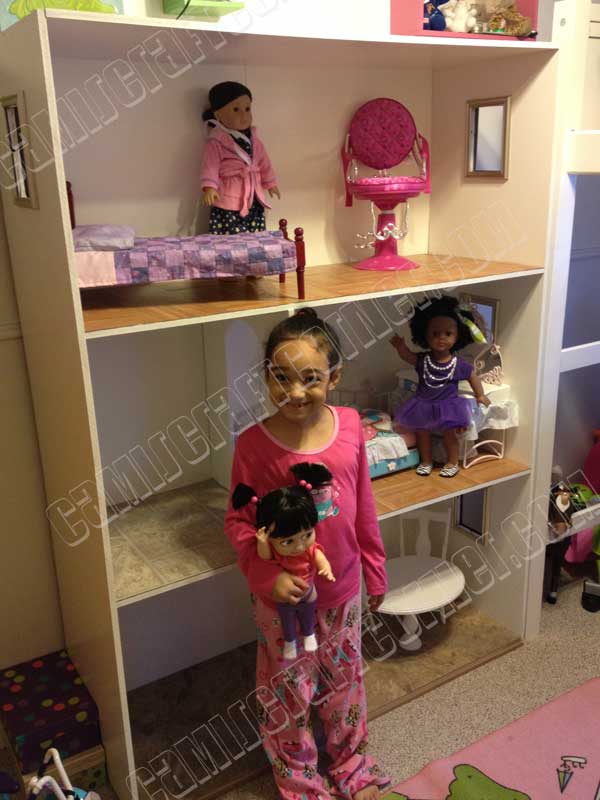
Total Excitement!
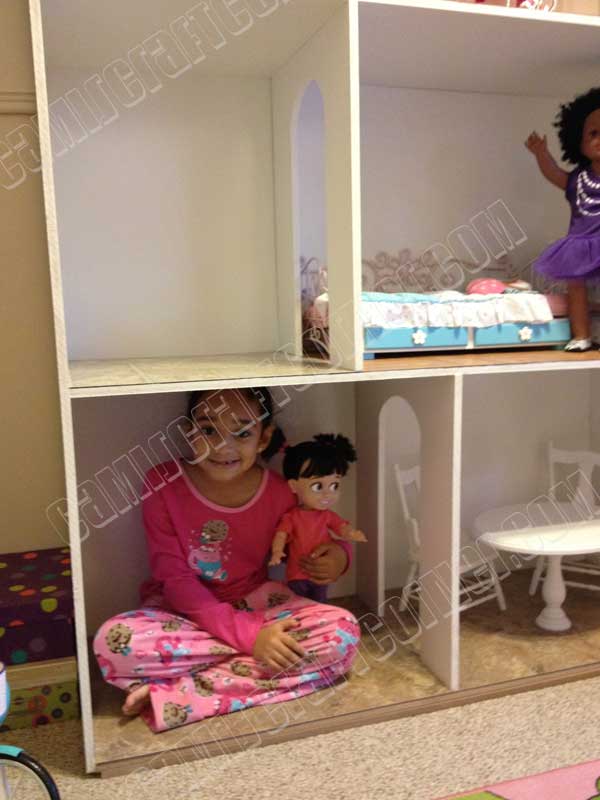
It’s Pretty Big…
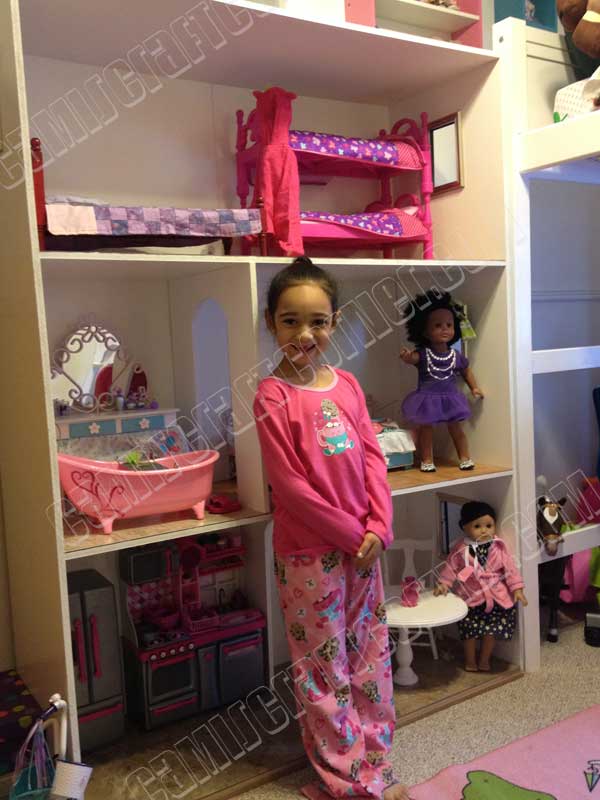
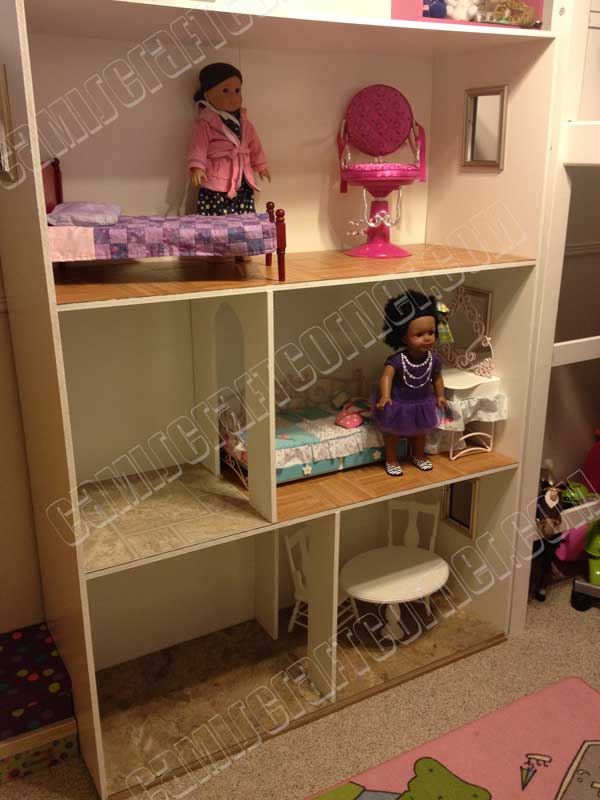
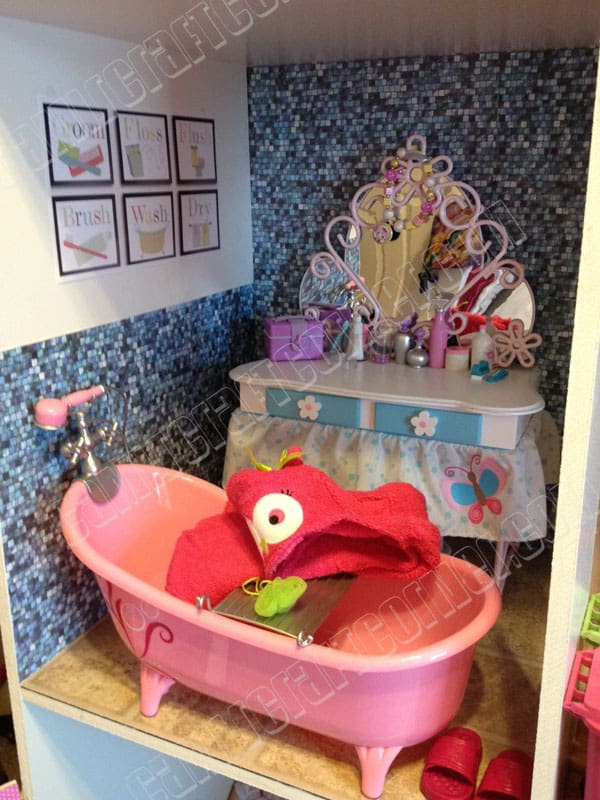
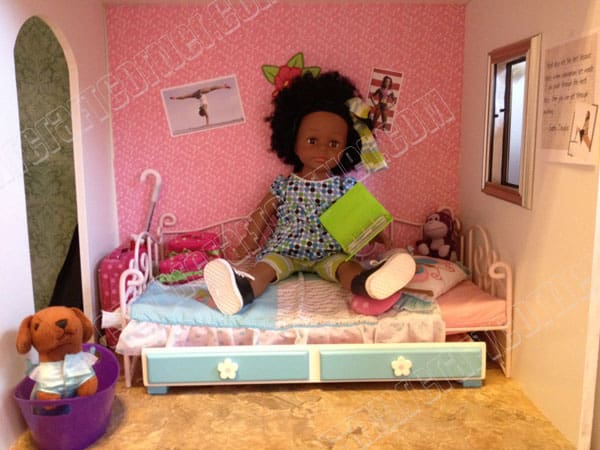
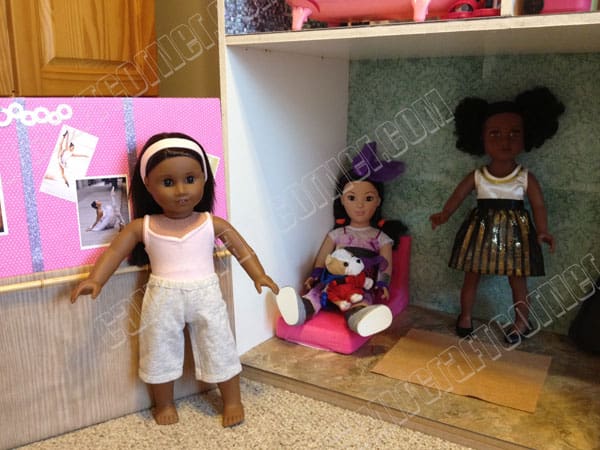
All Moved in, with Her New Kitchen and Bathroom Set!
With painting, this project took two very unskilled people three days. Seriously, we go into Home Depot for light bulbs and furnace filters. That’s it. But we ended up with an awesome, and very sturdy (in case you’re wondering) DIY American Girl Dollhouse, and a thrilled 6 year old. I’ve tried to recap it as well as I could, but I’ll be happy to answer any questions posted.
Also, while we have sprung for two American Girl dolls, almost all of my daughter’s doll accessories and furniture come from Target (Our Generation Kitchen, Bathroom, Dresser, Daybed with Trundle, Salon Chair, Horse, and Scooter), Wal-Mart (My Life As Bunkbeds) and ToysRus (Journey Girls Puppy Set and Bicycle). Stay thrifty!
Special Thanks to the wonderful folks at the Edgewood, MD Home Depot and the best STEM teacher, ever, Steve !
Feel free to share this page, but please link back to this site. If you make your own, I would love to see how it turns out!
Once again, here are the plans we used: Cami’s Craft Corner Dollhouse Plans
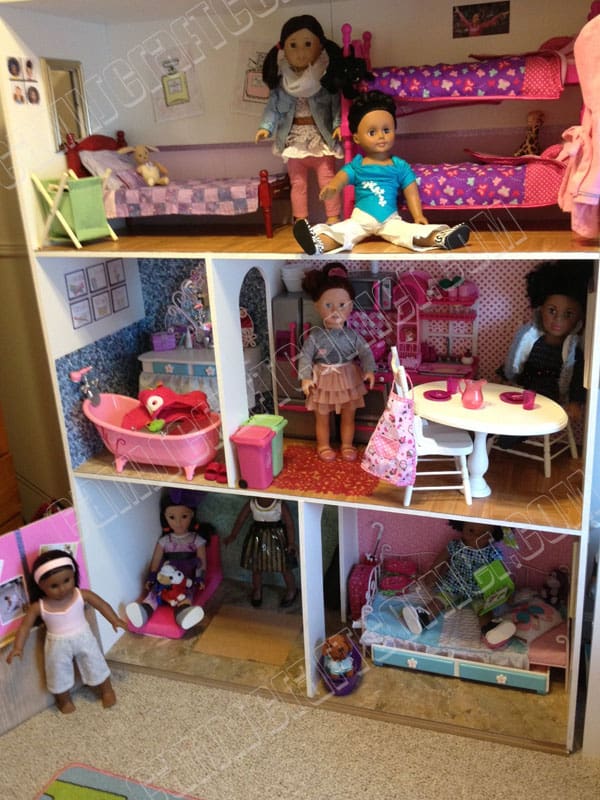
American Girl Dollhouse Update
We finally got around to adding some flair to the rooms! We caught a scrapbook paper sale at Michael’s Arts & Crafts, and printed some of our favorite pics off of our Pinterest boards. Definitely feels like “home” now!


